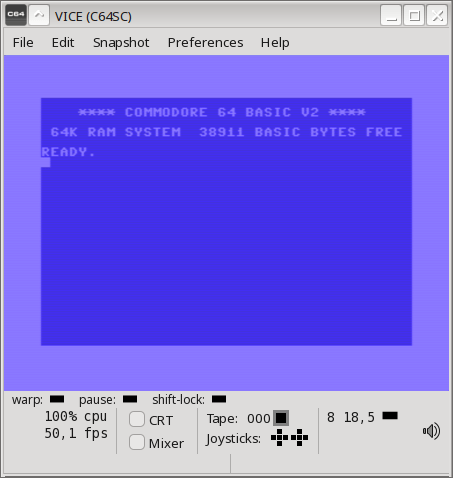
Its Christmas 2024 and the amazing VICE team have given us an amazing gift, A new version of the VICE emulator which comes with a load of bug fixes and improvements.
All good, however, the binaries that have been pre-compiled do not include one for Fedora (.rpm), so we will have to download the source code, compile and install it ourselves (which can be a terrifying though for us newbies) but with help from some very clever friends, I will hopefully guide us through the process and we will be able to refer back for the next release.

1. Getting Things Ready.
Firstly, we have to download the latest copy from Sourceforge at https://sourceforge.net/projects/vice-emu/ and unpack it. As my machine runs KDE, I used the archive manager Ark for this last step. Then, enter the newly created folder and open a terminal to begin the magic.
Before we compile, we have to make sure the system is up to date, using the following command:
$ sudo dnf update
This will, of course, require you to enter your root password, allow it to finish updating and then we can get started with the real fun.
2. Installing the prerequisites.
Secondly, VICE is a great and versatile emulator. It does a lot of things next to emulation, so it needs some external programs and libraries. We can install those from the command line as follows:
$ sudo dnf install gcc gcc-c++ automake libcurl-devel libevdev-devel libevdev-utils flex byacc texinfo gtk3-devel glew glew-devel pulseaudio-libs-devel alsa-lib-devel alsa-lib xa
This improvised list of dependencies is not complete, but it’ll for a vanilla compile of the GTK3 port of VICE.
3. Configuring things.
After the updates have finished, we have to configure the build using the following command
$ ./configure –enable-gtk3ui –disable-pdf-docs
We can enable and disable the features that we do and do not want to include in the build process, making it possible to create a version that is unique to your system and runs well. Please note some experimental or obscure features are usually turned OFF by default, so if you like to play around with them you need to enable them at compile time. You can catch an idea of what extra features VICE has from the manual (or from reading the output of ./configure –help).
Traditionally configure selects the destination prefix of ‘/usr/local’ on your file system for the targets to finally live in after building. You can supply other destination prefixes, such as ‘/opt/vice’, if you don’t want or need it in /usr/local. However, I went with /usr/local since that is my preferred destination for compiled software, and it’s already in my PATH variable, so I can start VICE from anywhere.
Should configure exit with an error message, you’ll likely be given some hint as to what is missing. The VICE team spent quite some time making things easier to understand if something goes wrong during the configure step. There will also be a configure.log file written to your folder, so you can also look at that for hints.
4. Building things.
After everything has finished, and no errors have occured it is time to finally build the binaries. To do this enter “make” in the console where you ran the configure command.
$ make
What follows will be dependent on what you have in your configuration and obviously the speed and memory on your machine. But if all goes well, then you will have a fresh bespoke VICE emulator compiled just for you, right with all the knobs and dials you configured.
The next step is to install it to your system, and this most likely needs ‘root’ permissions. Here, we use sudo to achieve the install to the /usr/local hierarchy.
$ sudo make install
installed on your system, the only thing left to do is launch and configure it!
x64sc
( In the unlikely event of a build failure, look at the last 20-30 lines of console output. Most of the time, you’ll find error messages there and work on that. )
Everything went fine, and VICE 3.9 started up? Congratulations!


